Table of Contents
Crème Brûlée always sounds super fancy, right? I mean, the name itself makes you think of posh French restaurants and tiny plates. But what if you could whip up a five-star restaurant treat like Crème Brûlée in your own kitchen… with, like, hardly any fuss? If you’ve ever thought, “There’s no way I can pull that off at home,” you’re not alone (been there, doubted that). I’m about to show you it’s way easier than you might imagine to make Crème Brûlée, and trust me, you do not need a culinary degree or even a tiny torch (though, honestly, the torch is kinda fun). 
Overview of Crème Brûlée
First things first: What exactly is Crème Brûlée? It’s a creamy, dreamy custard topped with a crisp layer of caramelized sugar. The name literally means “burnt cream,” but that doesn’t sound half as tasty! You crack through the crisp topping with your spoon and scoop up that silky creamy goodness underneath… Ah, it’s a combo that’s tough to beat.
I love it because it’s deceptively simple. Seriously, there’s only a handful of ingredients. The magic happens in the texture—that contrast between the crackly top and the soft, pudding-like inside. There’s something very old-fashioned about it almost, but it never goes out of style. And get this: if you have eggs, cream, and sugar, you’re halfway there already.
People always act like this dessert is intimidating or only for fancy folks (or for Saturday nights out). Let’s prove them wrong. We’ll make Crème Brûlée the star of your home kitchen—no tuxedo required. 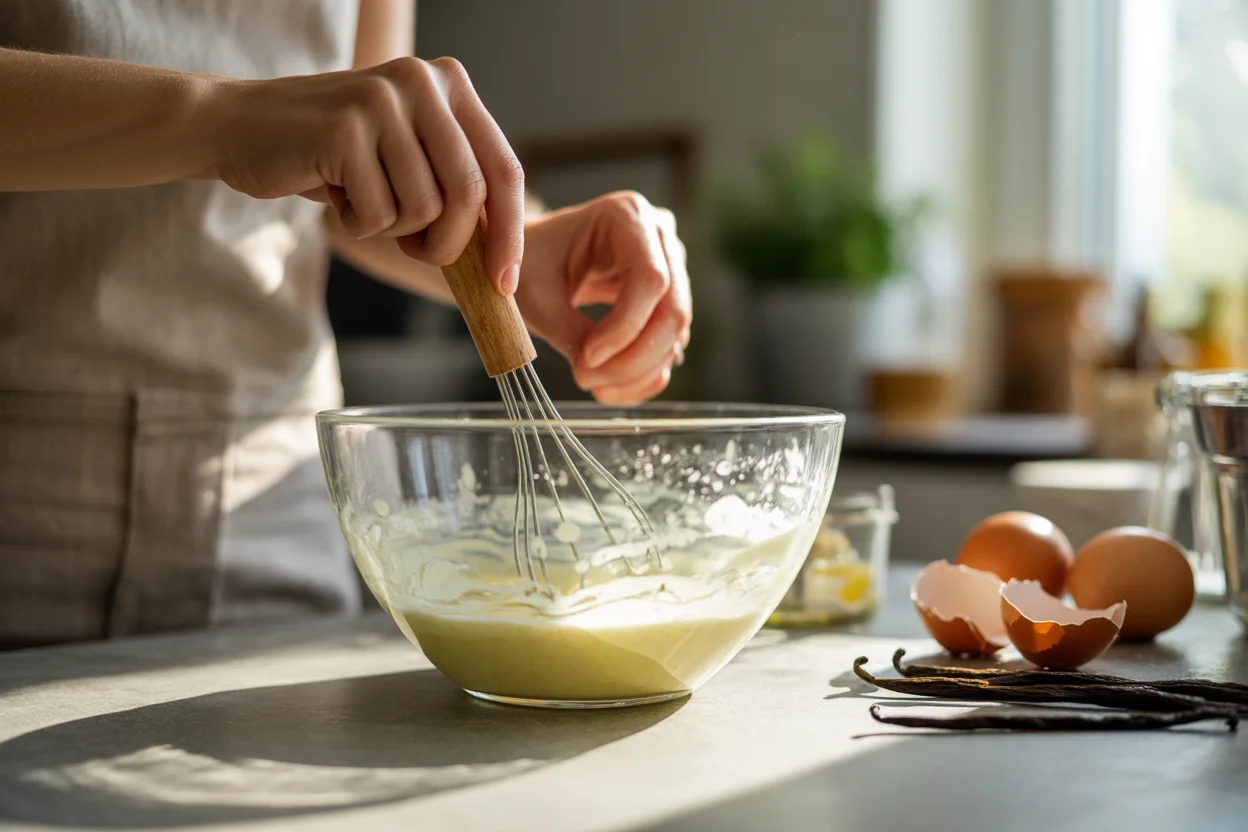
“I’d never made Crème Brûlée before, but the simple steps made it easy and my family pretty much begged me to make it again the next weekend. Ten out of ten!” — Maddy H.
| Ingredient | Quantity | Purpose |
|---|---|---|
| Egg Yolks | 5-6 | Rich custard base |
| Heavy Cream | 2 cups | Provides creaminess and texture |
| Granulated Sugar | 3/4 cup | Sweetens custard and caramelizes for topping |
| Vanilla Extract | 1 tsp | Enhances flavor |
| Pinch of Salt | 1/8 tsp | Brings out the sweetness |
Key Ingredients for Crème Brûlée
Let’s talk what you need. Crème Brûlée doesn’t ask for weird stuff or anything that’ll have you hunting down gourmet aisles for hours. Here’s what you want in your fridge and pantry:
- Egg yolks (you only need the yolks, not the whole egg). This is important! Yolks give that rich, custardy base.
- Heavy cream. Don’t swap this for milk—trust me, it ruins the texture. You want the full-fat stuff.
- Granulated sugar. Part of it goes in the custard, part gets sprinkled on top for that iconic caramel crunch.
- Vanilla extract or, if you’re feeling extra, a vanilla bean. The vanilla flavor is king here.
- Pinch of salt. Optional, but brings out the flavors.
See? That’s really it. No fancy liqueurs, no powders that cost twenty bucks an ounce. Just the basics. If you want to see more pantry-friendly recipes, check out my homemade desserts roundup in easy dessert recipes.
Step-by-Step Instructions for Making Crème Brûlée
Okay, let’s get to the good stuff—the how-to. This is just you, a whisk, and a dream. No need to panic if the first one’s not perfect (mine probably looked like scrambled eggs if I’m honest).
Start by preheating your oven (I like 325°F for that gentle cook). Set your ramekins in a baking dish. Fill a kettle with water and put it on—this’ll make sense soon.
Next: Whisk together those egg yolks and about half your sugar until it’s a bit pale and creamy. Warm your cream and vanilla in a saucepan—don’t boil it, just hot enough that it steams. Slowly, little by little, pour the hot cream into the yolks, whisking all the while (do this too fast and, poof, you’ve got sweet scrambled eggs).
Pour that lovely custard through a strainer into a pitcher. Ladle it into your ramekins. Here’s where the kettle comes in: carefully fill your baking dish with hot water until it comes about halfway up the ramekins’ sides, like a little bath. Into the oven it goes for about 35-40 minutes. You want it to jiggle like Jell-O, not wiggle like water.
Let them cool, then pop them in the fridge (a couple hours at least). Don’t rush this step unless you love disappointment.
If you’re looking for more ideas on how to get perfect custard, you can check out my kitchen-tested techniques in how to bake homemade custards.
Tips for Perfecting the Topping
That caramelized sugar shell is the best part, hands down. Here’s where you get to feel like a mad scientist—or like you’re on a cooking show. You’re making sugar magic.
First, your sugar should be super fine so it melts evenly. If yours feels chunky, pulse it in a blender for a sec. Sprinkle a light, even layer on top of each cold custard (like snow, not like a ski slope after a blizzard).
Some folks use a broiler. This is… okay, but I honestly swear by a handheld torch. Cheap ones work $20 magic. Move the torch in small circles until the sugar bubbles, turns amber, then hardens in a snap.
If you must use a broiler, watch like a hawk. Sugar burns fast. You’ll want the ramekins right up near the heat, a few inches away.
When it’s done, let them sit for 5 minutes so the sugar turns glassy. Grab your spoon and whack—yeah, that’s what you’re after. Oh, and don’t be shy about experimenting. Mix some brown sugar in, or toss a pinch of instant coffee in the sugar for a twist.
Serving Suggestions for Crème Brûlée
Here’s what I always tell friends: Crème Brûlée doesn’t need dressing up but a little razzle-dazzle never hurt anyone.
- Serve with fresh berries (raspberries, strawberries, or blueberries). It adds color and tang.
- Dust a little powdered sugar on top, just for the photos—okay, and the flavor.
- Serve with a strong espresso for that European café vibe.
- Try adding zest of orange or lemon into your cream for a hint of citrus magic.
If you want to learn more tricks for desserts that wow at parties, my festive sweets guide (festive dessert ideas) is worth checking out.
Common Questions
Q: Can I make Crème Brûlée without a torch?
A: Yep, just use your oven’s broiler. It works in a pinch, just be extra careful not to burn the sugar.
Q: Why is my custard runny?
A: You probably underbaked it. It should jiggle like set Jell-O, but not be liquid. Back in the oven with it!
Q: Can I make Crème Brûlée ahead of time?
A: Totally. Bake and chill it a day or two before, then do the sugar topping right before serving.
Q: What if I only have 2% milk?
A: I’d really recommend heavy cream, but if you must try milk, don’t expect that signature creamy texture.
Q: Is it okay to use store-bought custard?
A: Honestly, no. The real deal is so simple, and the results are way better. Give it a try—you’ll never look back.
Ready to Crack That Sugar?
Making Crème Brûlée at home isn’t magic—it’s totally doable. Follow a few simple steps like this Easy Crème Brûlée Recipe from Sally’s Baking. For background, here’s its history on Wikipedia and more tips from RecipeTin Eats. Want other takes? Try the Perfect Crème Brûlée Recipe at AllRecipes or this fan-favorite from Chef in Training. Blowtorch optional—your next dinner just leveled up.

Crème Brûlée
Ingredients
Method
- Preheat your oven to 325°F (165°C).
- Set your ramekins in a baking dish.
- Whisk together the egg yolks and about half of the granulated sugar until pale and creamy.
- Warm the heavy cream and vanilla in a saucepan until steaming, but do not boil.
- Slowly pour the warm cream into the yolk mixture while whisking continuously.
- Strain the custard mixture into a pitcher.
- Ladle the custard into the prepared ramekins.
- Fill the baking dish with hot water until it reaches about halfway up the sides of the ramekins.
- Bake in the oven for 35-40 minutes until the custard jiggles like Jell-O.
- Remove from the oven and let cool for a bit before refrigerating for at least 2 hours.
- Sprinkle a thin, even layer of granulated sugar on top of each cooled custard.
- Use a kitchen torch to caramelize the sugar until it bubbles and turns amber.
- If using a broiler, watch closely to prevent burning.
- Let the caramelized sugar sit for 5 minutes before serving.