Table of Contents
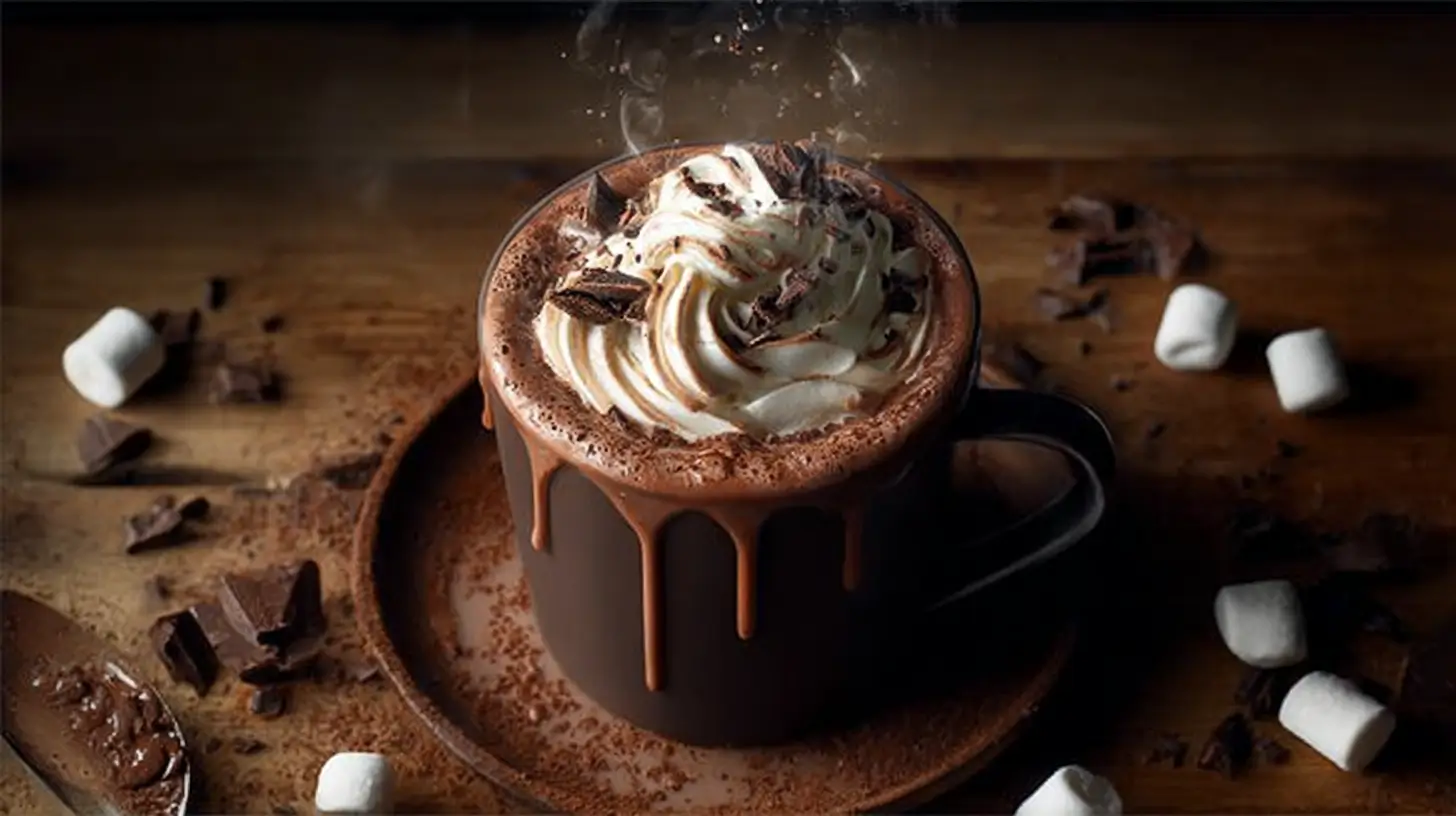
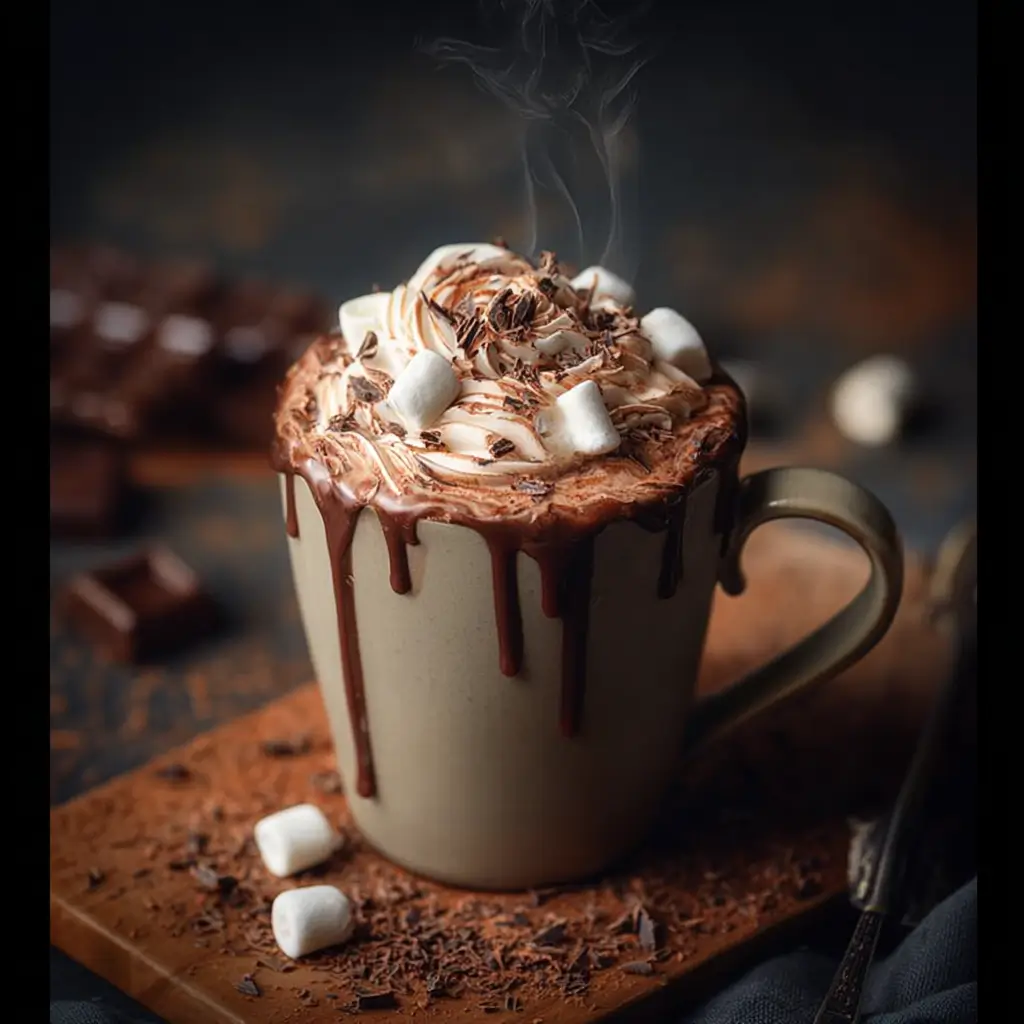
Hot chocolate transforms your kitchen into a cozy winter haven, where steam curls upward like delicate ribbons and rich cocoa aromas envelop your senses in pure comfort. This velvety elixir begins with quality cocoa and warm milk, creating a canvas for your creativity that’s perfect for capturing stunning Hot Chocolate Photos or creating your own Hot Chocolate Art. Whether you’re seeking the perfect Close-up Of Hot Chocolate for social media or simply craving soul-warming sustenance on a chilly evening, this homemade version delivers restaurant-quality richness. Picture the kind of Hot Chocolate Dark Aesthetic that belongs in a magazine—marshmallows floating like clouds, whipped cream swirled with artistic flair, all worthy of the most beautiful Hot Chocolate Images Hd.
Why You’ll Love This Recipe
- Real chocolate creates a depth of flavor that packet mixes simply can’t match—smooth, luxurious, and intensely satisfying.
- The beautiful presentation rivals any café creation, making it perfect for Hot Chocolate Food Photography that captures every creamy detail.
- Natural antioxidants from quality cocoa provide health benefits that make indulgence feel a little less guilty.
- Simple ingredients transform into liquid comfort that soothes both body and soul during cold winter months.
- Customizable toppings let you create artistic presentations worthy of professional Chocolate Sculptures and food styling.
Recipe Snapshot
| Feature | Details |
|---|---|
| Category: | Beverage |
| Cuisine: | Comfort |
| Prep Time: | 5 minutes |
| Cook Time: | 8 minutes |
| Total Time: | 13 minutes |
| Dietary: | Gluten-Free, Vegetarian |
| Serves: | 4 |
| Best Served: | Hot |
Ingredients
- Whole milk (3 cups) – creates the creamy, luxurious base that photographs beautifully
- Semi-sweet chocolate (4 oz, chopped) – real chocolate delivers superior flavor and texture chocolate
- Unsweetened cocoa powder (2 tbsp) – intensifies chocolate flavor and adds rich color
- Granulated sugar (3 tbsp) – balances cocoa’s natural bitterness
- Pure vanilla extract (1 tsp) – enhances chocolate notes with aromatic warmth
- Pinch of salt – amplifies all flavors and balances sweetness
- Heavy cream (optional, ¼ cup) – creates extra richness for special occasions
- Mini marshmallows – classic topping for visual appeal and sweetness
- Whipped cream – adds luxury and creates stunning Hot Chocolate Pictures
- Chocolate shavings – elegant garnish for professional presentation
Hot Chocolate
Ingredients
Method
- Chop semi-sweet chocolate into small, uniform pieces for even melting.
- Heat milk in a heavy-bottomed saucepan over medium-low heat, stirring occasionally until steaming (not boiling).
- In a small bowl, whisk cocoa powder, sugar, and salt. Add 2 tablespoons of warm milk to make a smooth paste.
- Add chocolate pieces and cocoa paste to the warmed milk. Whisk constantly for 3–4 minutes until smooth and fully melted.
- Remove from heat, stir in vanilla extract. For extra richness, slowly whisk in heavy cream if using.
- Pour into warmed mugs, leaving space for toppings.
- Top with marshmallows, whipped cream, or chocolate shavings. Serve immediately.
Notes
How to Make the Recipe
Creating perfect hot chocolate is an art form that transforms simple ingredients into liquid comfort worthy of your best Hot Chocolate Photo collection.
Step 1: Prepare Your Chocolate Base
Chop semi-sweet chocolate into small, uniform pieces to ensure even melting. This creates the foundation for rich, smooth hot chocolate that photographs beautifully.
Step 2: Warm the Milk Gently
Heat milk in a heavy-bottomed saucepan over medium-low heat, stirring occasionally to prevent scorching. Watch for gentle steam—never let it boil.
Step 3: Create the Chocolate Mixture
Whisk cocoa powder, sugar, and salt in a small bowl. Add 2 tablespoons of warm milk to create a smooth paste, eliminating any lumps.
Step 4: Combine and Melt
Add chopped chocolate and cocoa mixture to the warm milk. Whisk constantly for 3-4 minutes until chocolate melts completely and mixture becomes silky smooth.
Step 5: Add Final Touches
Remove from heat and stir in vanilla extract. For extra richness, fold in heavy cream slowly while whisking to maintain the perfect texture.
Step 6: Serve with Style
Pour into warmed mugs, leaving room for toppings. This is your moment to create Hot Chocolate Art with carefully arranged marshmallows and cream.
Step 7: Garnish and Photograph
Top with whipped cream, marshmallows, or chocolate shavings. Capture that perfect Close-up Of Hot Chocolate before the first sip!
Pro Tips for Making the Recipe
- Use a thermometer to keep milk between 160-180°F—hot enough to melt chocolate without scalding the milk.
- Invest in quality chocolate for superior flavor—the difference is immediately noticeable in both taste and visual appeal.
- Warm your mugs beforehand by rinsing with hot water to keep your hot chocolate at the perfect temperature longer.
- Create texture contrast with toppings—smooth whipped cream against crunchy chocolate shavings makes stunning photography.
- For the ultimate Hot Chocolate Dark Aesthetic, use darker serving vessels and dramatic lighting to emphasize rich chocolate tones.
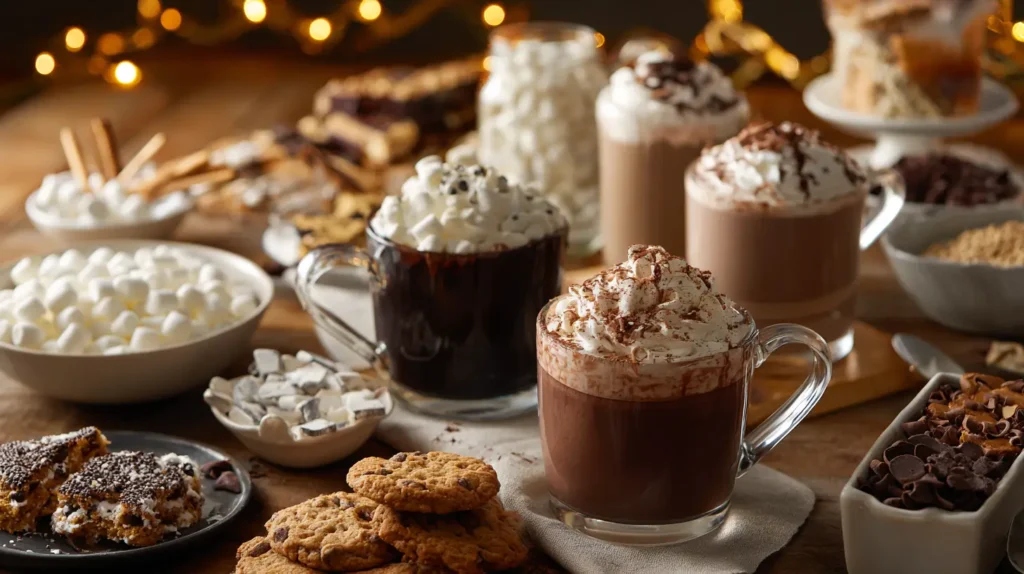
How to Serve Hot chocolate
Transform your hot chocolate service into an artistic experience that rivals the most beautiful Hot Chocolate Images Hd you’ve ever seen:
- Present in oversized ceramic mugs that showcase the rich, dark color and create perfect proportions for photography.
- Create a hot chocolate bar with various toppings—marshmallows, whipped cream, chocolate chips, and candy canes for customization.
- Serve alongside homemade cookies or biscotti for elegant dipping and textural contrast.
- Garnish with cinnamon sticks for stirring and a subtle spice aroma that enhances the experience.
- Add a dollop of flavored whipped cream—peppermint, orange, or vanilla—for gourmet appeal.
- Create beautiful latte art using steamed milk for those Instagram-worthy Hot Chocolate Food Photography moments.
- Serve in glass mugs to showcase the rich, dark liquid and any layered toppings for maximum visual impact.
- Accompany with small spoons for stirring and eating marshmallows, making the experience interactive and fun.
- Present on wooden trays with complementary snacks for a complete comfort food experience.
- Use seasonal garnishes like star anise or orange zest to create themed presentations perfect for Chocolate Art inspiration.
Make Ahead and Storage
Storing Leftovers
• Refrigerate leftover hot chocolate in airtight containers for up to 3 days, maintaining flavor and quality.
• Cool completely before refrigerating to prevent condensation that could affect texture.
• Store without toppings to preserve individual component quality and prevent soggy marshmallows.
• Label containers with date and reheat only the amount you plan to consume immediately.
Freezing
• Freeze plain hot chocolate base in ice cube trays for individual serving portions that reheat quickly.
• Store frozen cubes in freezer bags for up to 2 months, perfect for quick single servings.
• Avoid freezing with dairy cream additions as they may separate when thawed.
• Freeze chocolate base concentrate separately and add fresh milk when reheating for best results.
Reheating
• Warm gently on stovetop over low heat, whisking constantly to prevent separation and maintain smooth texture.
• Use microwave in 30-second intervals, stirring between each heating to ensure even warming.
• Add fresh milk if mixture seems too thick after refrigeration, whisking to restore original consistency.
• Never boil when reheating as this can cause curdling and destroy the silky texture you worked to create.
FAQs
What are the health benefits of cocoa and dark chocolate?
Cocoa contains powerful antioxidants called flavonoids that support heart health, improve brain function, and may help reduce inflammation. Quality cocoa also provides minerals like magnesium and iron while potentially boosting mood through natural compounds.
Can I substitute different types of milk?
Absolutely—almond, oat, or coconut milk work beautifully for dairy-free versions, though they may create slightly different textures and flavors that can be equally photogenic for your Hot Chocolate Pictures.
How can I add flavor without extra calories?
Enhance your hot chocolate with warm spices like cinnamon, nutmeg, or cardamom, or add extracts like almond or orange for complex flavors without additional sweeteners.
Can I meal prep hot chocolate?
Yes—prepare the chocolate base concentrate ahead of time and store refrigerated, then simply add warm milk and reheat for quick, comforting drinks throughout the week.
Final Thoughts
This homemade hot chocolate recipe elevates a simple winter drink into an artisanal experience that nourishes both body and soul. Whether you’re creating stunning Hot Chocolate Food Photography for social media or simply seeking comfort on a cold evening, this rich, velvety beverage delivers satisfaction in every sip. The beauty lies not just in the final product—those perfect Hot Chocolate Images Hd you’ll want to share—but in the mindful process of creation itself. From melting quality chocolate to arranging artistic toppings that rival professional Chocolate Sculptures, making hot chocolate becomes a form of edible art. Embrace the ritual, savor the warmth, and let each cup remind you that the simplest pleasures often bring the greatest joy.